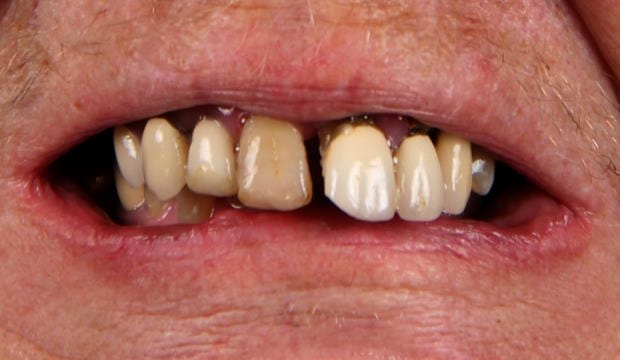
BEFORE

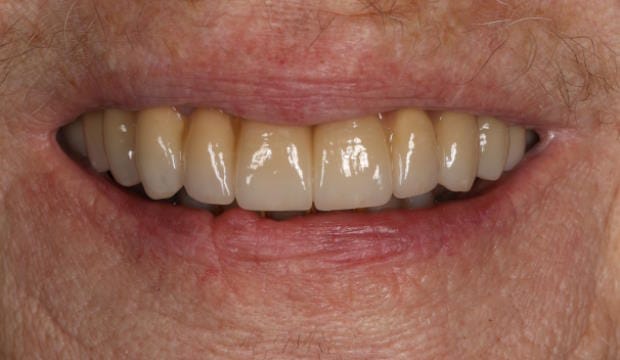
AFTER
How do Dental Bridges work?

Step 1: Diagnosing
In this case we utilised standard conservative prosthodontic planning protocols. The elderly patient did not mind coming a few times more, but keep the session length to a minimum.

Step 2: Treatment
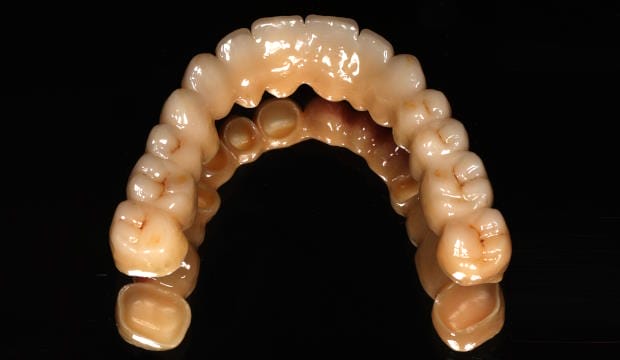
Initially, we took our set of diagnostic pictures scanning both arches and took the digital bite. Mr Leventi then produced a digital wax-up and a PMMA eggshell temporary. We removed all decays, prepared the teeth for the full arch bridge, extracted the hopeless teeth and refitted the temporary eggshell bridge. Due to the stability of the PMMA bridge we could now treat all the teeth with apical infections or caries profunda with root canal treatments.

Step 3: Results
After a healing period of six months, we took the final impressions and placed the stained and glazed full ceramic zirconia bridge. To my surprise the bridge fit was outstanding, so a great thank you to Gianluigi and the milling centre in Italy for managing the sintering process of the ceramic material so perfectly.
Explore more of our before & afters…
Wimpole St Dental Clinic has strict sourcing guidelines and relies on peer-reviewed studies, academic research institutions, and medical associations. We avoid using tertiary references. You can learn more about how we ensure our content is accurate and current by reading our editorial policy.


