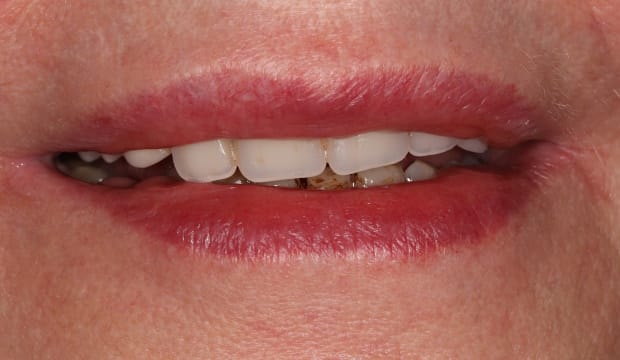
BEFORE
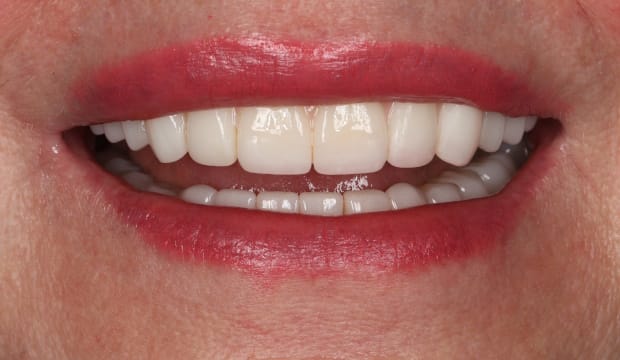
AFTER
How do All-on-4 Dental Implants work?

Step 1: The initial situation
Severe periodontal disease root canal infections were very evident on inspection. We met with the patient and listened to their request for a long-lasting restoration.
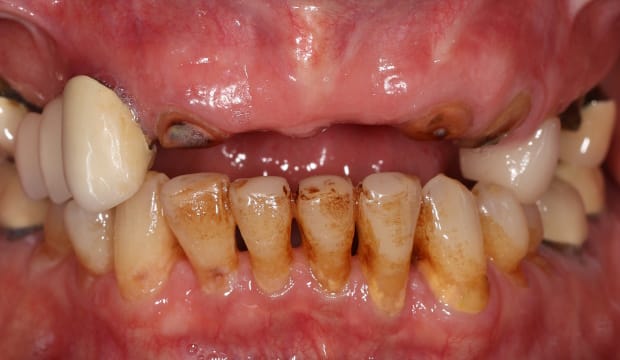
Step 2: Diagnostic treatment planning
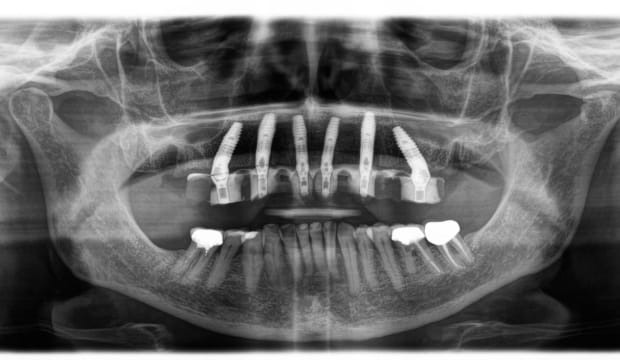
After obtaining a set of pictures, 3D X-ray and detailed diagnostic treatment planning, we went ahead with extracting all her remaining upper jaw teeth followed by a deep scaling and root planing in the lower jaw, again followed by the placement of six implants in her upper jaw with simultaneous bone augmentation.
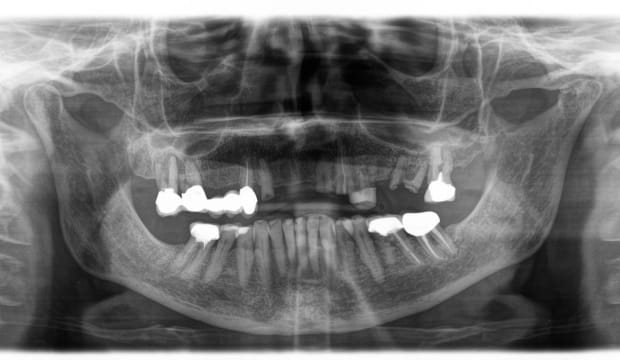
Step 3: Implantation
The image shows the jaw before implantation. These implants were loaded immediately with a set of temporary teeth that were digitally designed, milled and ready prior to the surgery.
Step 4: Initial healing phase
After an initial healing phase of three weeks in the upper jaw, the lower teeth were root canal treated were needed, decay removed and implant placed for the lost first left molar and a refitted PMMA egg-shell temporary placed to test the bite and the aesthetics of the future restoration.

Step 5: Post-three months
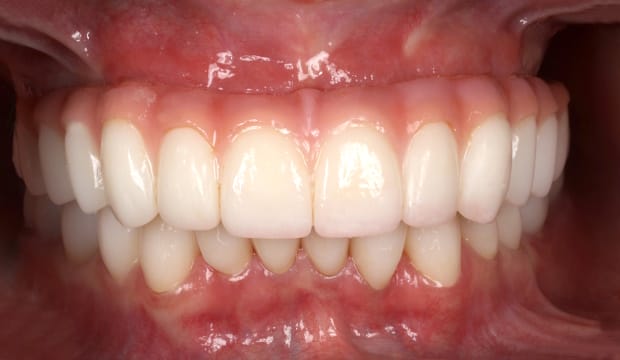
After overall three months the temporaries were changed to a permanent restoration (CoCrMoW framework, PMMA teeth and Bis-GMA gum imitation in the upper jaw and full ceramic crowns in the lower jaw.
Step 7: Results
The technician then produced the final restoration and the patient’s soft and hard tissues were ready to receive the implant supported restorations. A small composite bonding was placed to cover the defects of the right lateral incisor. After the final check the situation presented itself stable and the smile restored.
Explore more of our before & afters…
Wimpole St Dental Clinic has strict sourcing guidelines and relies on peer-reviewed studies, academic research institutions, and medical associations. We avoid using tertiary references. You can learn more about how we ensure our content is accurate and current by reading our editorial policy.


