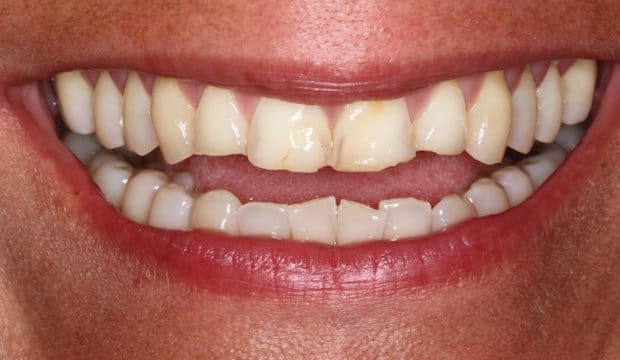
BEFORE
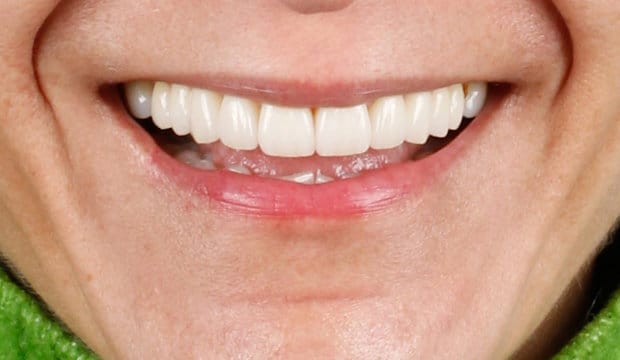
AFTER
How does Smile Makeover treatment work?
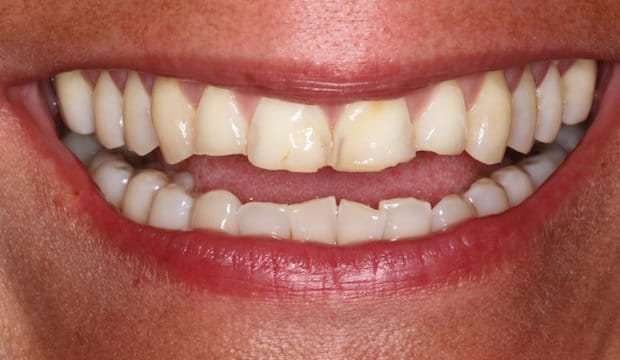
Step #1 Initial Smile
The patient’s teeth were chipped and worn down, giving her smile an aged appearance.
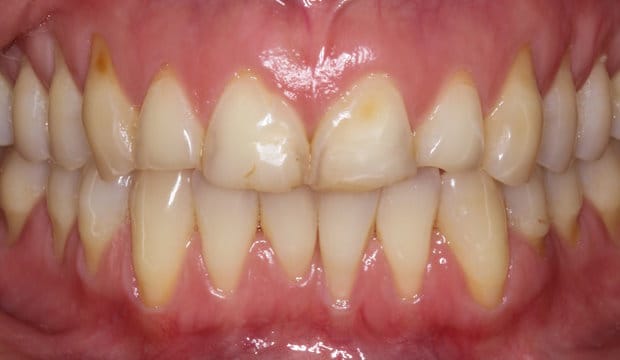
Step #2 Smile with Lips Retracted
Visible gum recession contributed to an uneven gum line and further discomfort.
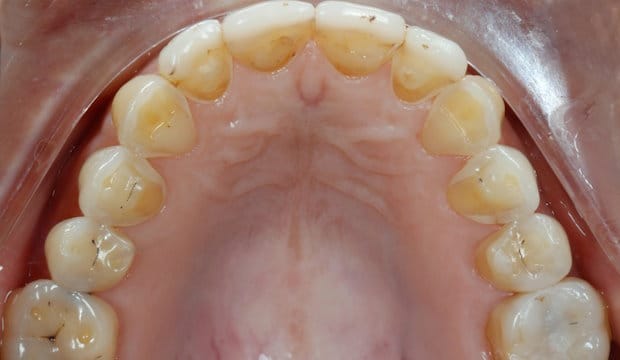
Step #3 Upper Jaw, Initial Situation
Wear had also affected the palatal sides of the teeth, leading to sensitivity.
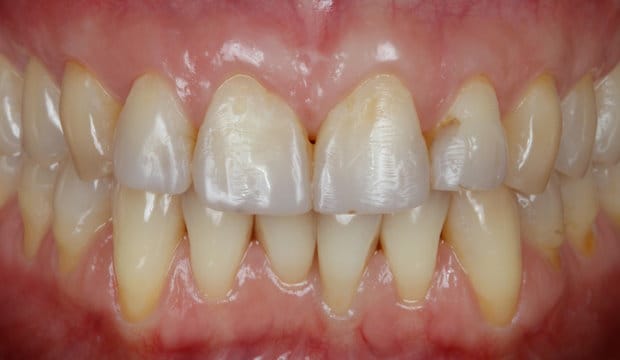
Step #4 Gum Grafts and Temporary Repairs
We performed gum grafts to cover the recession and applied temporary composite veneers.
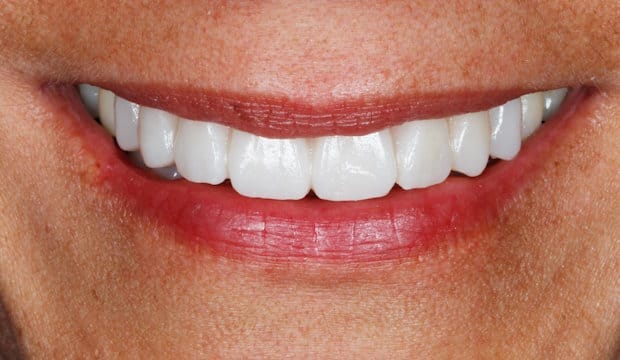
Step #5 Mock-up of Veneers Design
A mock-up of the future veneers was created, allowing us to study the shapes and visualize the final outcome.
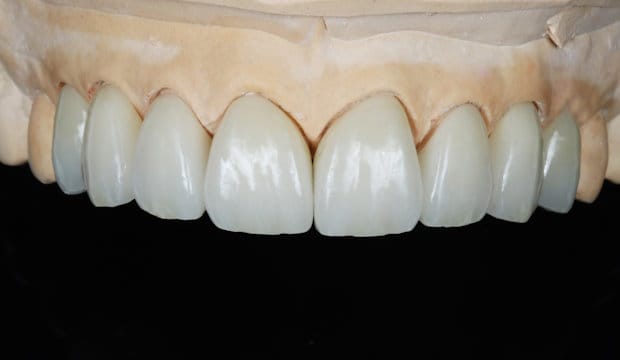
Step #6 Porcelain Veneers on Master Casts
The final veneers were fabricated, showcasing precise craftsmanship and attention to detail.
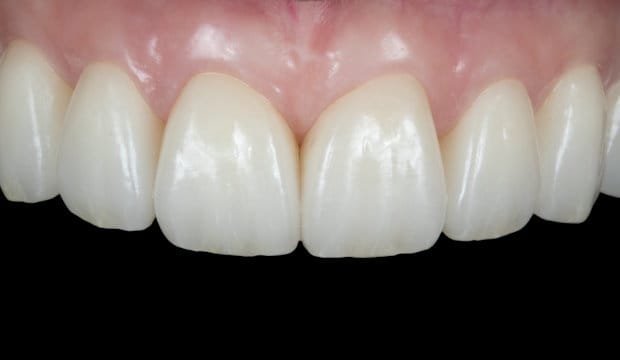
Step #7 Veneers Fitted
The veneers were fitted perfectly. With healthy gum architecture and excellent work by the dental technician, the aesthetic result was remarkable.
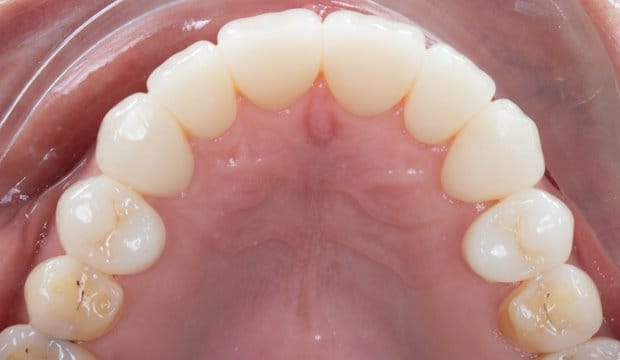
Step #8 Occlusal View of Final Veneers
Not only did the veneers restore the appearance of the teeth, but they also restored function by covering defective areas on the palatal side.
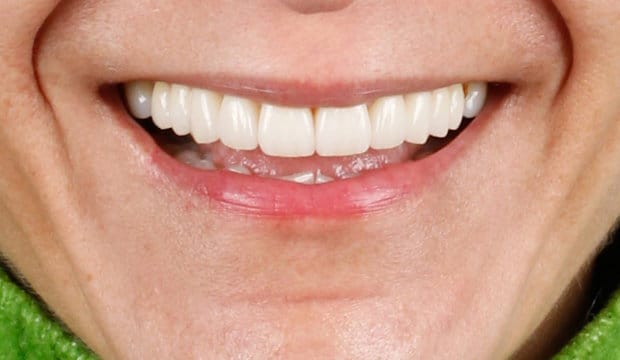
Step #9 Final Smile (Front View)
The patient’s new teeth were natural-looking, with anatomy and shade that blend seamlessly.
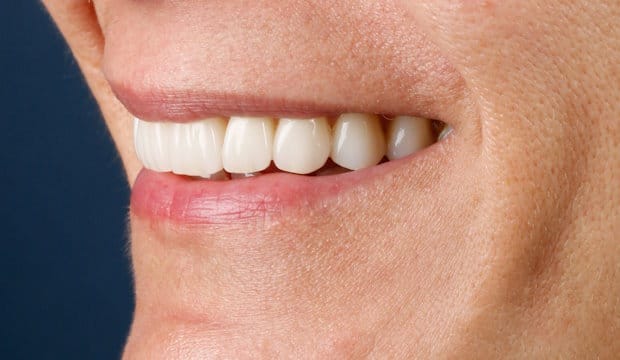
Step #10 Final Smile (Lateral View)
A lateral view highlights the perfect optical integration of the ceramic veneers, ensuring a harmonious and aesthetically pleasing result.
Explore more of our before & afters…
Wimpole St Dental Clinic has strict sourcing guidelines and relies on peer-reviewed studies, academic research institutions, and medical associations. We avoid using tertiary references. You can learn more about how we ensure our content is accurate and current by reading our editorial policy.


